Router Forums banner

24x30 multipurpose shop

15K views 51 replies 20 participants last post by  JFPNCM  
#1 ·
After joining, I haven't posted much. Just wanted to share what I've been working on.

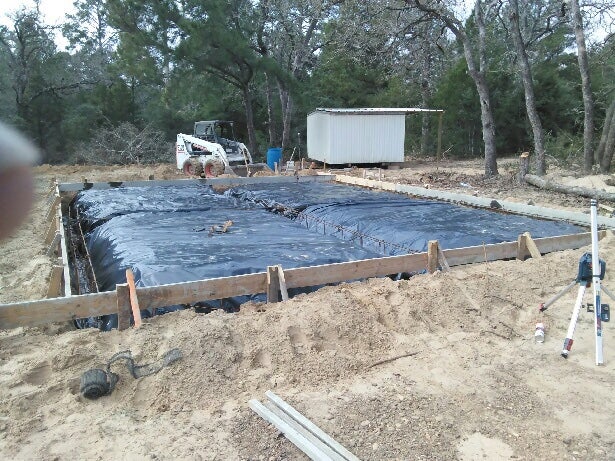
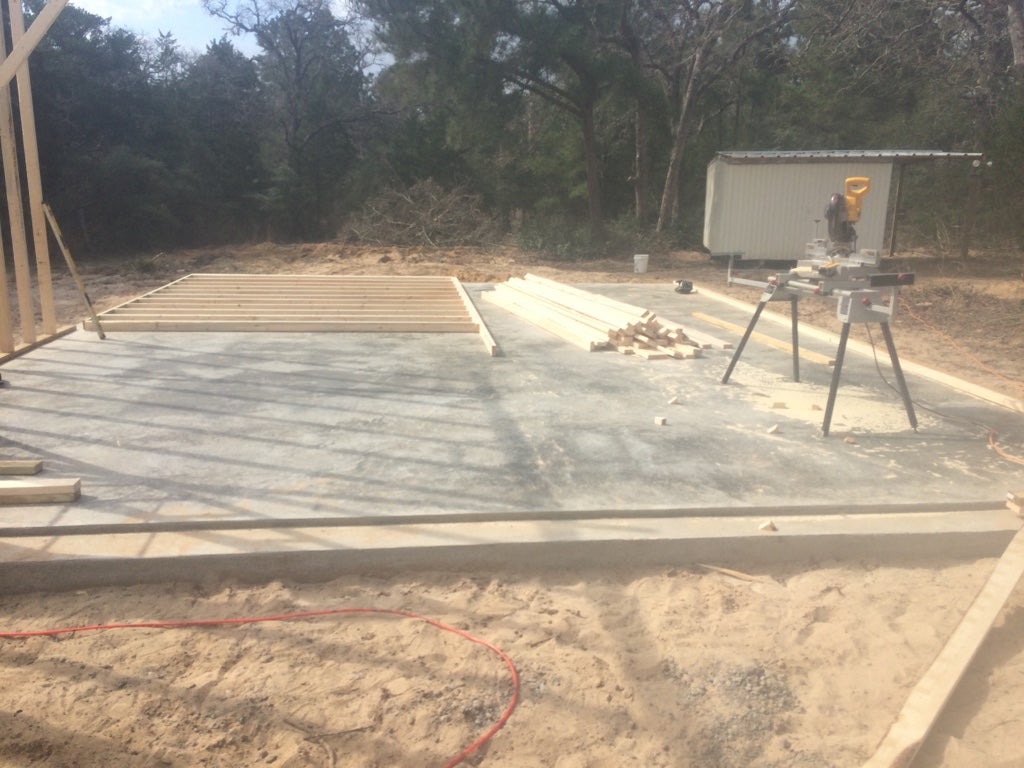
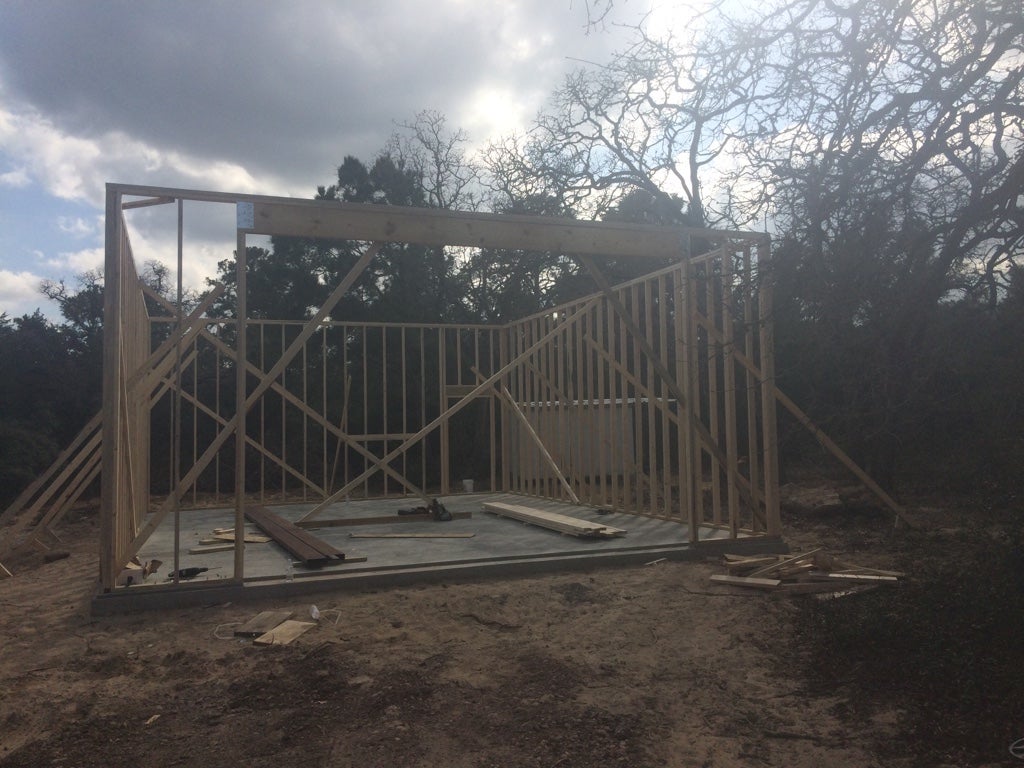
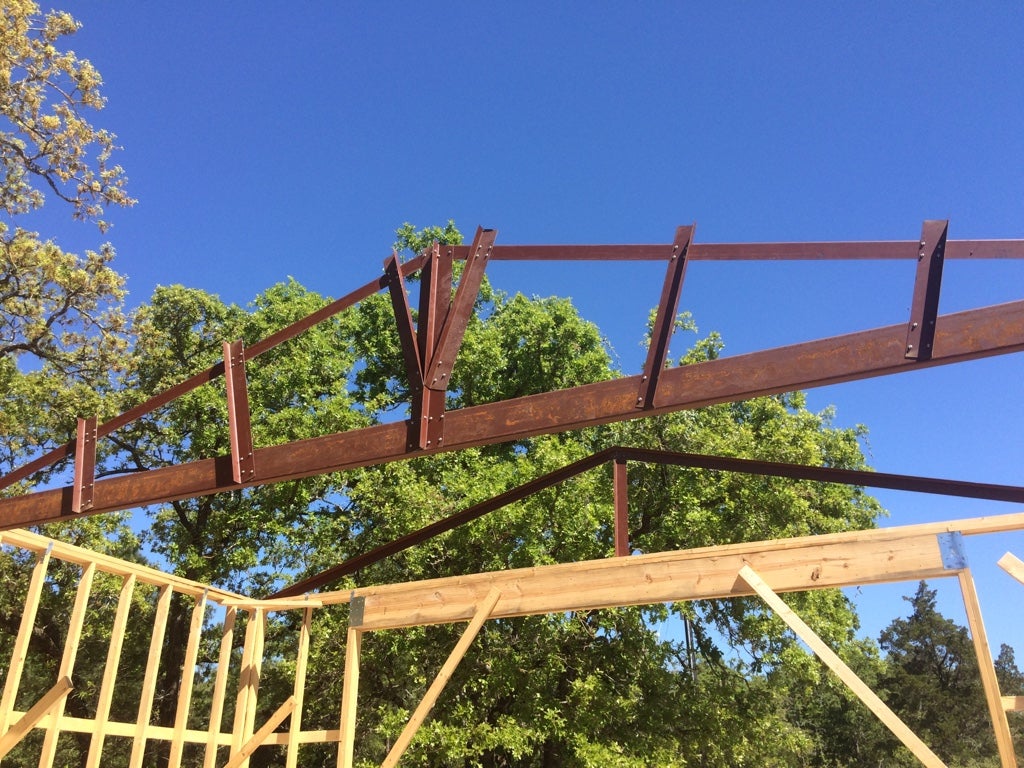
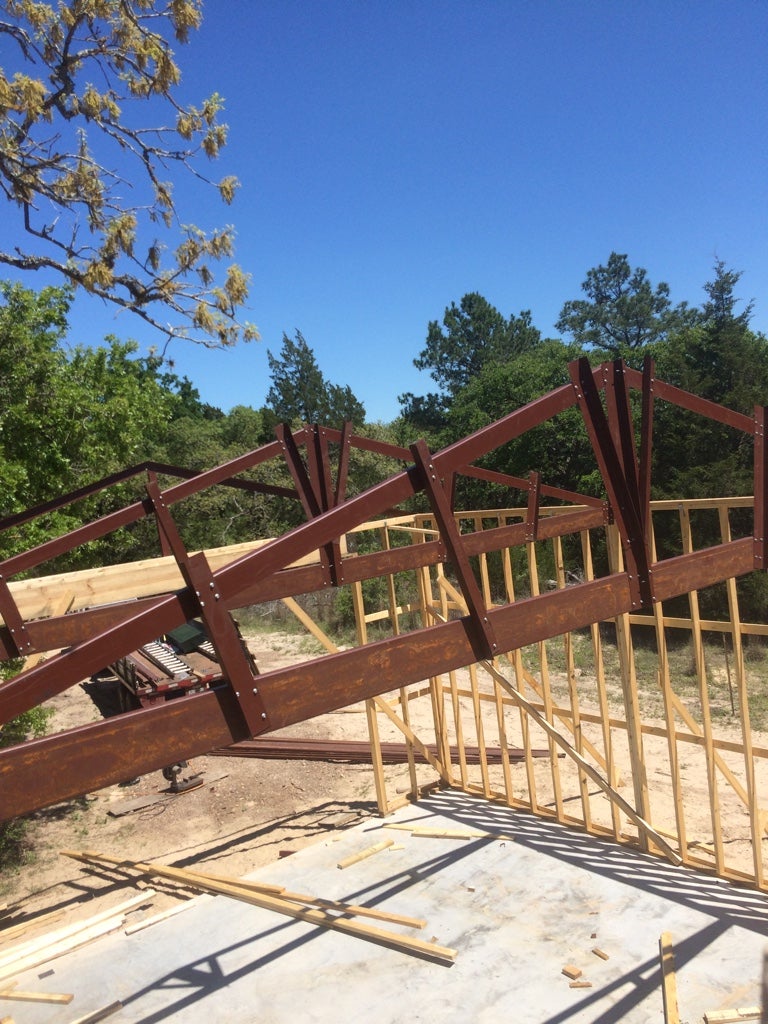
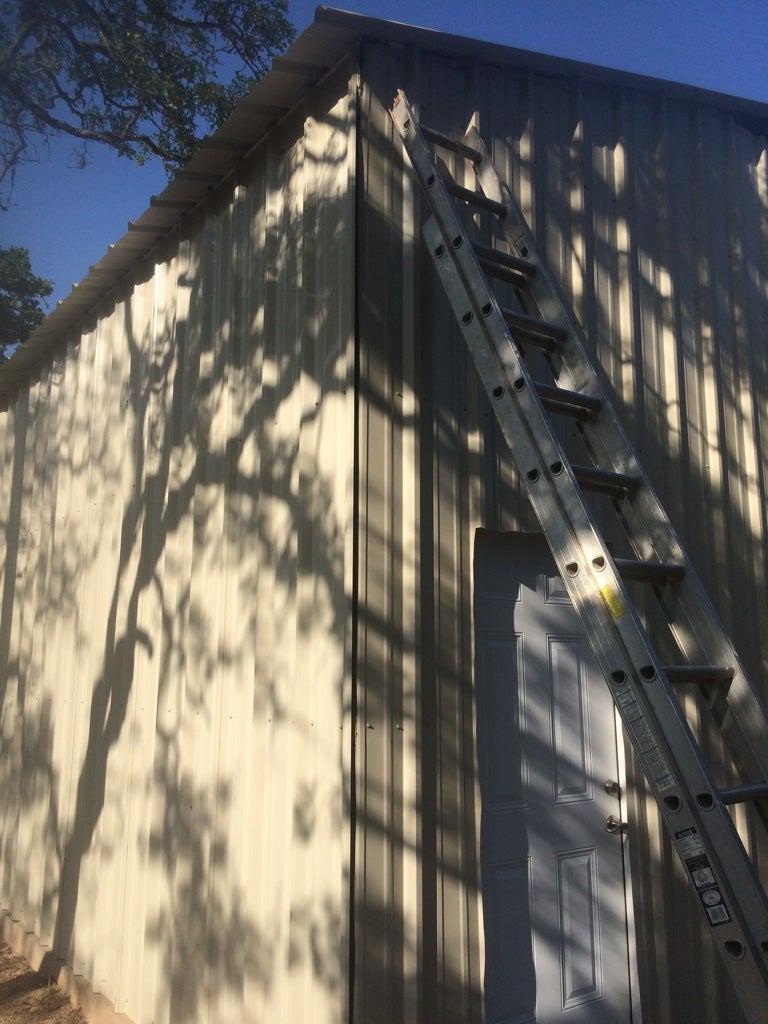
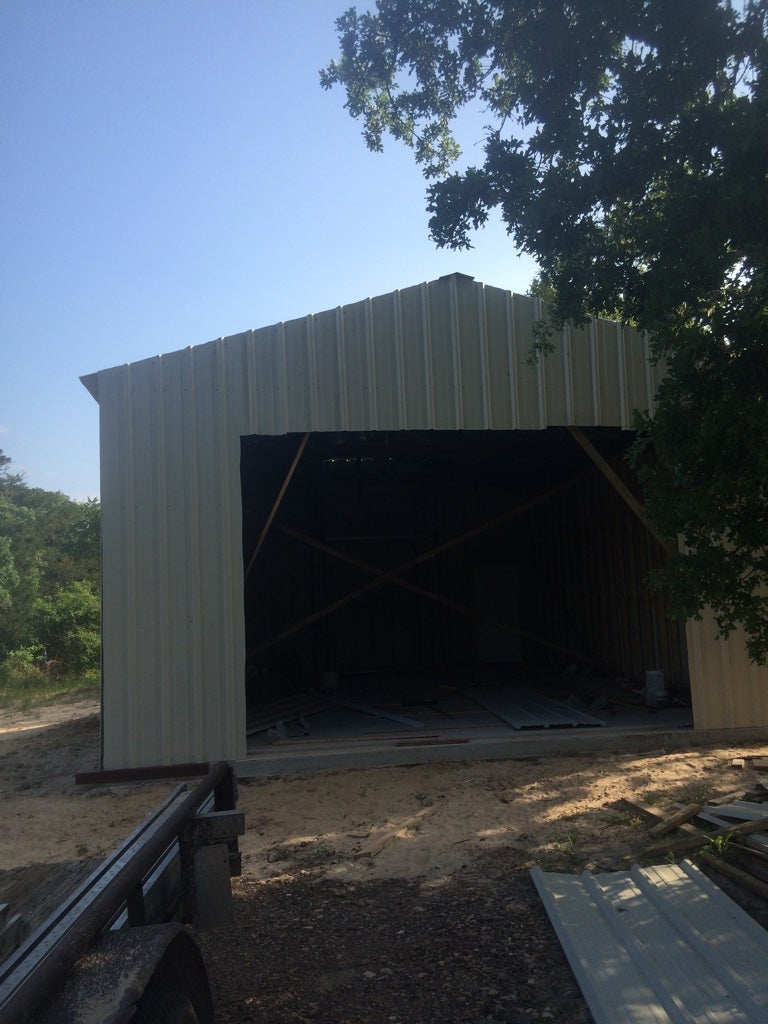
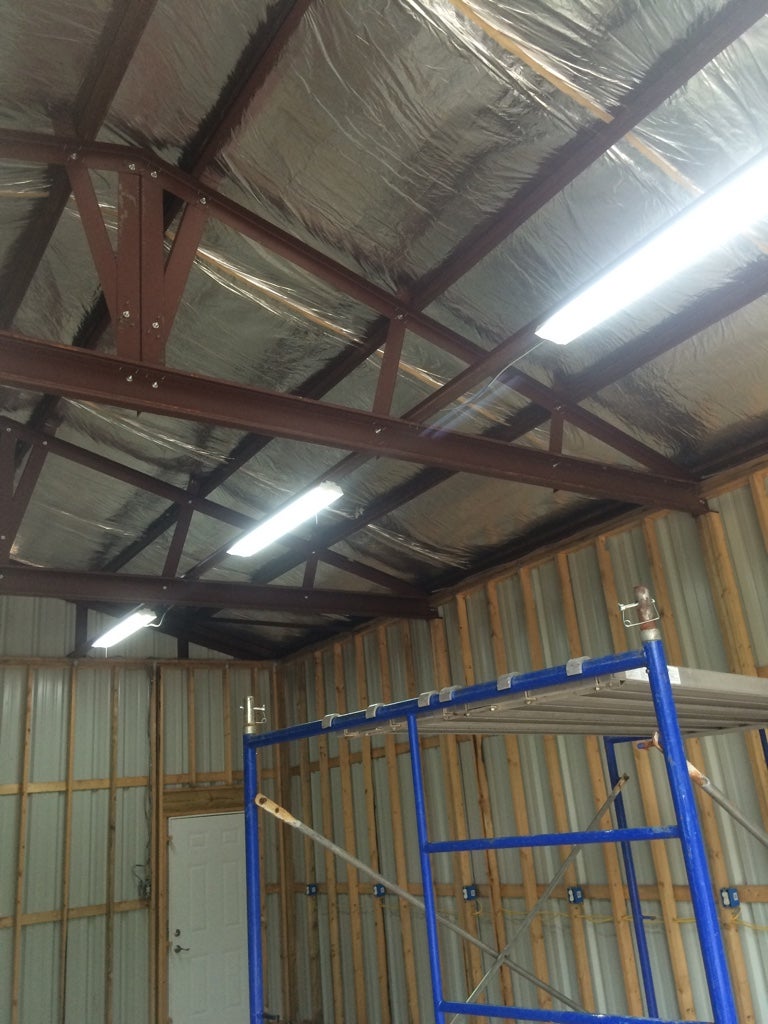
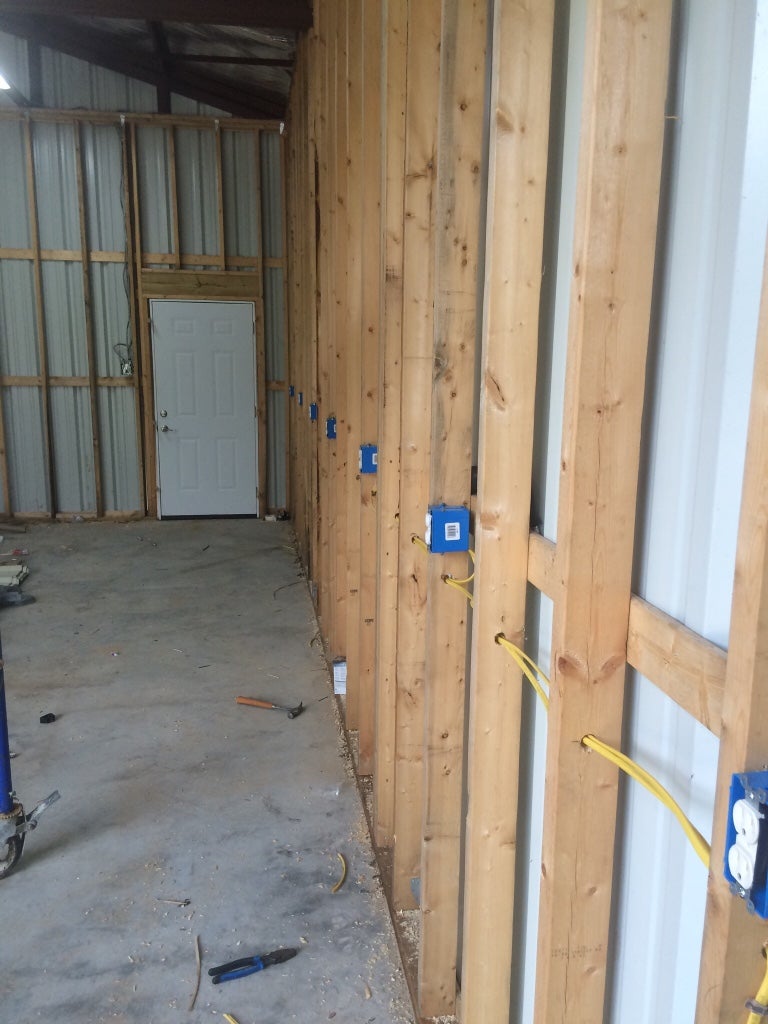
The shop is 24x30 with 12 foot walls. This will be used as a multipurpose shop as I dabble in several hobbies including woodworking, auto mechanics and welding.

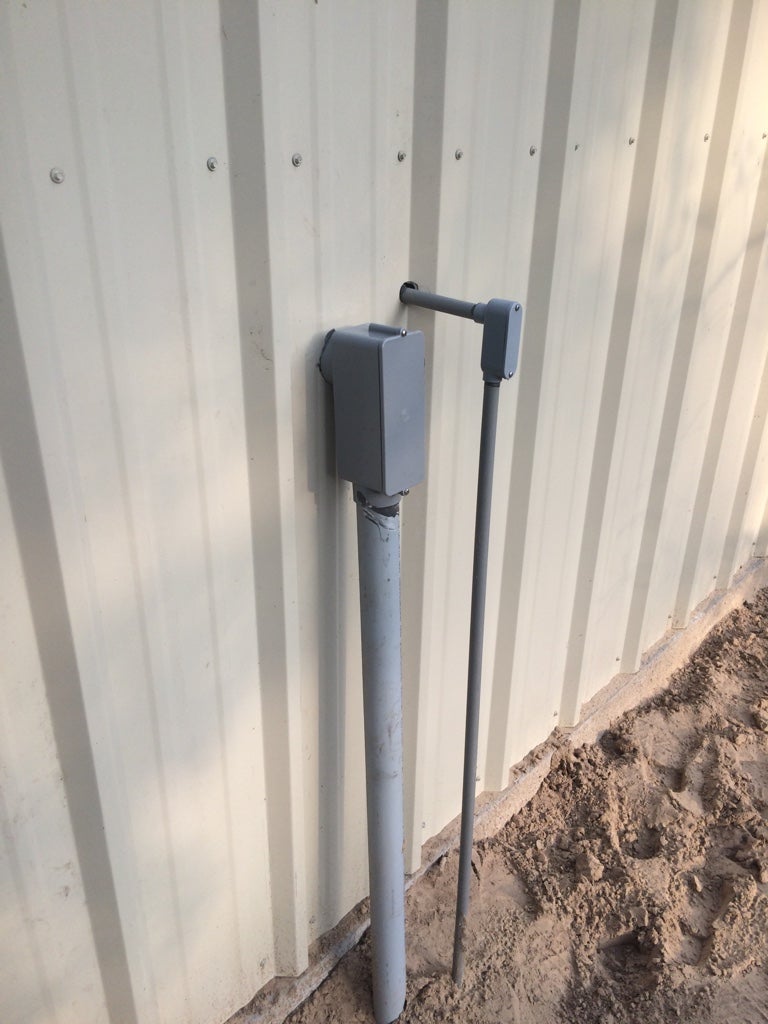
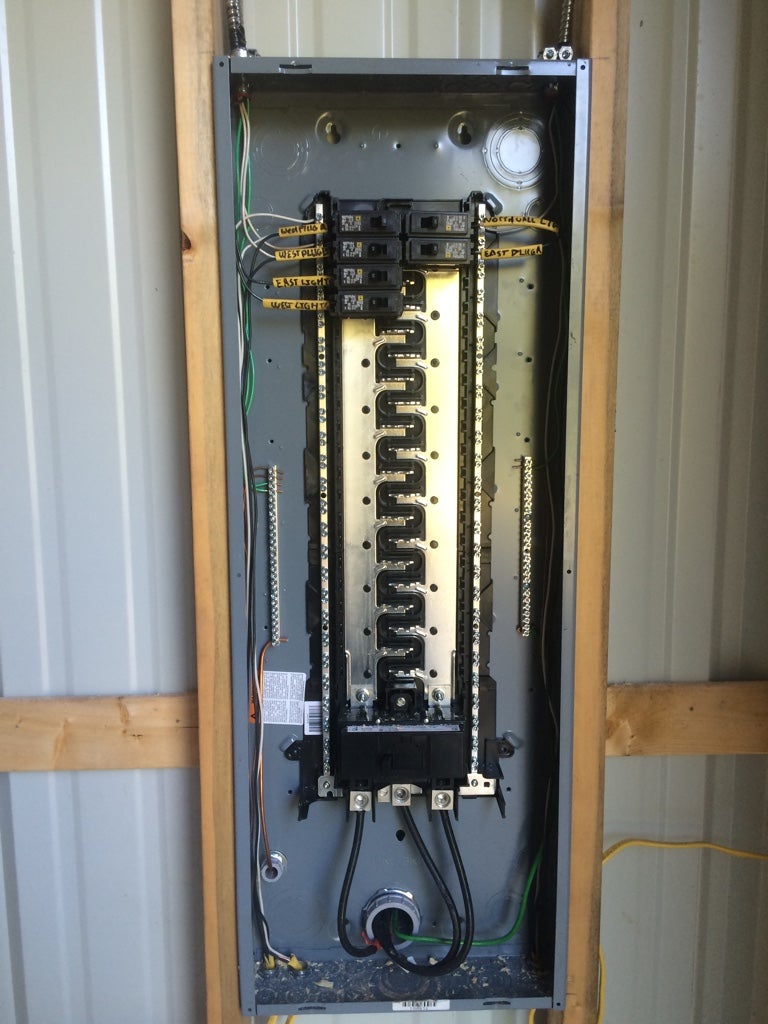
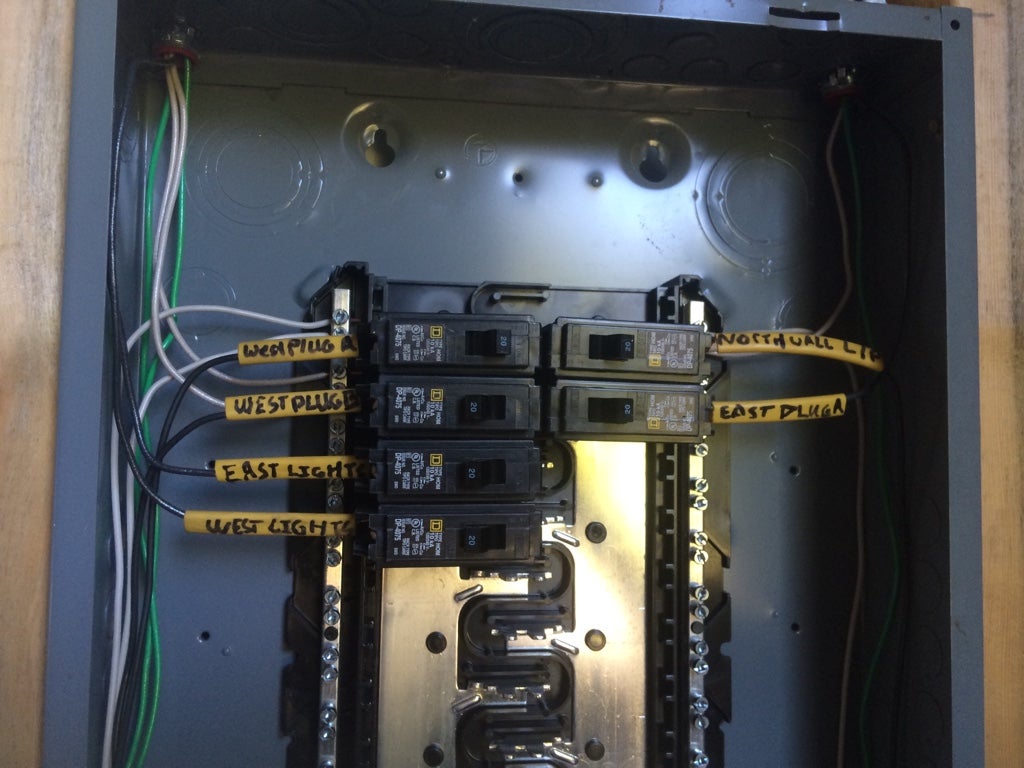
I had the slab poured by a contractor and all the framing my dad and I did. I've done the electrical myself.

The electrical is feed with 100 amps.

Best part is, my build cost is right at 14 dollars a square foot!

Anyways, on to the pics

Image


Image


Image


Image


Image


Image


Image


Image


Image


Image


Image


Image


Sent from my iPhone using Tapatalk
 
#7 · (Edited)
Very nice . Liking the electrical outlets . Lots of them and high ,looks like 4' high?
I see there 20 amp also . Another good idea .
Adding any 220 outlets?

Another thing to consider . Cat 5 from the house for Internet . Pre wiring alarm reeds and motion. Rg6 for the 42" flat screen :)
 
#12 ·
I am also jealous. It is so nice to build your own and get exactly how you want it. My son recently purchased a home that has a separate oversized 1 car garage size shop. I was green with envy since mine is a shared 2 car garage for the past 25+ years.
 
#14 ·
  • Thickened slab edges - critical, yet often overlooked.
  • Longitudinal Grade Beam
  • Transverse Grade Beam
  • Rebar Transitions from Thickened Edges to said Grade Beams
  • Truss Diagonal Members CANTILEVERED ABOVE slope of roof.
  • Sturdy Connections
  • Properly Labelled Electrical Breaker Box
Dustin, The two heads thinking together (you and Dad) make a great design team and having my long experience in building design and construction, I saw several things that y'all were EXTREMELY SMART about.

Keep-up the FANTASTIC WORK!
Otis Guillebeau from Auburn, Georgia
 
#15 ·
  • Thickened slab edges - critical, yet often overlooked.
  • Longitudinal Grade Beam
  • Transverse Grade Beam
  • Rebar Transitions from Thickened Edges to said Grade Beams
  • Truss Diagonal Members CANTILEVERED ABOVE slope of roof.
  • Sturdy Connections
  • Properly Labelled Electrical Breaker Box

Dustin, The two heads thinking together (you and Dad) make a great design team and having my long experience in building design and construction, I saw several things that y'all were EXTREMELY SMART about.


Keep-up the FANTASTIC WORK!

Otis Guillebeau from Auburn, Georgia


Thanks so much. Couldn't have done the construction without my dad. I can swing a hammer but he is the design expert. I have done a ton of research to do this right. You only get one shot at this.
 
#16 ·
I color coded all my circuits with electrical tape, then put color tape on each outlet cover so I can avoid accidentally overloading any particular circuit. Put lighting, heater and AC on one circuit and used LED, so there is plenty of power available to heat or cool while the lights are on. I generally have a machine, the dust collection and AC or heat on at the same time. I only have 60 amps available, 100 amps is really nice.

What are you going to do for insulation?
 
#17 ·
I color coded all my circuits with electrical tape, then put color tape on each outlet cover so I can avoid accidentally overloading any particular circuit. Put lighting, heater and AC on one circuit and used LED, so there is plenty of power available to heat or cool while the lights are on. I generally have a machine, the dust collection and AC or heat on at the same time. I only have 60 amps available, 100 amps is really nice.


What are you going to do for insulation?


I used solar guard on the roof. The walls will probably get standard batt insulation at some point. Insulation is low priority for now. I need to get this building ready to move tools into.

We are selling our house in a few weeks and are moving in with the in laws. They are giving us three acres to build our new house on.

The shop will be used to facilitate construction as well as store some of our stuff.
 
#18 ·
Great job so far Dustin. Running the 220 for the heavy machinery is always a little tricky because it you run it inside the wall it requires that you never move anything very far once hooked up and that you never replace it with something that requires more current draw and a larger size wire. For those reasons you may want to consider running those circuits on the face of the walls with either a wire mould or using armoured cable. If you run them down low they won't be that noticeable.
 
#19 ·
I currently do not have any equipment that requires 240v. However I will install one plug below the panel for just in case. I'll add more as I upgrade equipment in the future. I plan on making the wall covering above the breaker box removable to facilitate ease of install.


Sent from my iPhone using Tapatalk
 
#21 ·
Dustin if you upgrade to a 3 hp table saw it will be 220v. My dust collector is 9 amp 220v. A lunchbox type planer will run on 110v but if you go to floor standing models they will require 220v. My 8" jointer is also 220v. Keeping your options open now will make life easier in the future.
 
#23 ·
Man I would love a big cabinet table saw. I currently have an old craftsman that I inherited from my wife's grandfather when he passed.


I plan on OSB sheathing, painted white and there will be no ceiling in the shop.

With a removable panel above the breaker box, it will be really easy to run cable along the top plate into the appropriate stud space.

I feel like I should wait until I have the 240 equipment to size the wire appropriately for the amp requirements.

My welder is a Hobart handler 140 that runs on 120v. Not a bad little machine. I want to pick up a Lincoln stick welder for heavier gauge stuff.

I appreciate everyone's suggestions and kind words. Please keep it coming!

PS, here's a pic of the model number of my saw. Not much info on the net about it and I need to find a blade guard for it.

Image


Sent from my iPhone using Tapatalk
 
#24 ·
May I suggest that you paint the OSB while it is on the sawhorse ,easier and faster than after it is on the studs, at least the first coat, it soaks up paint like a sponge.

That TS would probably run on 220v. Mine did,and what a difference, never blew a breaker during ripping after that.

My current Craftsman 12" direct drive table saw runs on 220v. too and never has blown the breaker ripping.

Forgot ,like Chuck mentioned you will want a dust collection system too that will require 220 v.

Without a ceiling too you can always run overhead with the 220 v. an drop where the machines are located.

Herb
 
#25 ·
Good info on the painting.

That would be outstanding if the saw could be converted to 240. I'll have to research that.

Dust collection is high on the list of needs. The ole shop vac just isn't cutting it. I'll look into that once I start moving in and figure out my layout. I have some ideas laid out in sketchup but we'll see how it goes once I start putting things in their place.
 
#28 ·
Wow, that is turning into a great shop. Lots of good advice on the electrical. I don't know if it's too late, but I would put the outlets at 52 inches so you can fit a sheet of ply against the wall. I set mine too low and wish I hadn't. I also have to admit to a little shop envy.
 
#31 ·
@hunterguy86

Everything looks great so far. I've been building out a shop for a little less than a year now. Here's my advice:

1) Definitely get some 220v outlets set up. I don't own any 220v equipment currently, but everything I'm starting to think about buying is 220v. Specifically: dust collection (Laguna), Bandsaw (Lagina 14' SUV), and Tablesaw (Laguna). 220v extension cords are expensive, and increase electrical resistance, so think carefully about where you place the outlets.

2) I do some metal work too, and 120v outlets will cover most of your needs, unless you're trying to weld really thick metal together. Also, stick welding is a lot harder than MIG. Stick with MIG, and if you get a Lincoln Electric, take a look at their Power MIG 140.

3) Consider air extraction duct work in your design. It's really important for both for sawdust and welding fumes. Best setup is airtight, electrically grounded (lots of static charge buildup) ducts with some airtight blast gates to control airflow. Run the duct to several convenient locations, with a length of flexible 4in hose at the end, so you can still move equipment around.

4) A cheaper and easier way to promote clean air is opening barn doors on both sides of the shop, and setting up a small array of fans blowing outside at one of the doors. That makes the entire shop work like a downdraft table. But Proper dust extraction with 4in ducts will be much better at capturing high velocity sawdust before it gets into the air you're breathing.

Hope this helps. And don't get intimidated by cost - just prioritize what order you need things in and buy them one at a time.

Cheers.
 
#33 ·
Lots of good advice. What amp plugs did you go with? 30 or 50 amp?

I have a Hobart handler 140 that works like a champ. I've done more stick than mig welding but I do find mig to be an easier process. I do want to get a gas bottle for my welder. I have the regulator but have just been using flux core wire.

I also plan on getting a Lincoln stick welder for heavier gauge stuff.

Thanks for all the kind words y'all. Should have more updates soon.
 
#34 · (Edited)
Dustin I used 30 amp twist lock outlets in my shop for my table saw and anything else that's running 240V . Will have to install a 50 or 60 amp for my welder .
The bad news is there over a $100 for the wall outlet recepticle and the male end on the machinery . I started with them , so I outta finish that way I guess
 
#38 ·
what mess....
your new home is looking good Dustin...