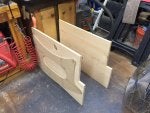
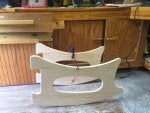
Guys, no way, no how, would I have turned that router on, like that. It was not plugged in!! I was fixing to unravel it, when the lights went out. So I just set it there, took a picture of what I was about to do, then I locked the shop up! BUT, good news! I went and sat with my wife on the patio, and within 10 minutes, the power was back on. And I got back on it!! Unraveled that there router, and went to trimming. Rough cut the second side (which I have a question, if I think about it...), and trimmed it as well. Then moved outside and sanded both sides, of both sides of the High Chair. Rudy (my dog) was there, cheering me on, or eating sawdust, one of the two!! Then brought the spindle sander outside and sanded all my curves. And this brings me to lunch time!! Going to take a break, eat, maybe take a nap, then, as per instructions, I have run an 1/4" round over bit, on both sides, of both sides of the High Chair!! Don't want no sharp corners for the baby!! ;o)
Back to my question. I bought some new jig saw blades for my jig saw, I can't remember the details of the blades, but they were Bosch blades, pacifically for wood. But when I went to use one, it made my jig saw jump. It would cut a little bit, then try to jump out of the wood. What the heck would cause that? I found an older blade (but I don't think it was ever used), a little wider then I liked, for cutting curves, but it did not jump at all. Why did these Bosch blades do this? I guess I'm going to try and return them, and try another brand.


")