Hi Ed
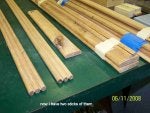
In one of the snapshots you will see one I made,,,it's not a big one...
( 1 1/4" OD x 12" long)
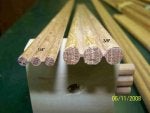
Along time ago I had the same tool and made many rope items,lamps,candle stands,etc. and the router lathe can do that job very well...
But I got bored with the lathe and sold it off then I saw one on eBay so I got one more, I must have gotten smarter since then,,,, from along time ago because I can see many new ways to use the machine now..
")
====