Hi
I'm making a chest of drawers with 5 drawers out of recycled native (NZ) timber. To have it match existing furniture I've made (in the same room), I want to have the face of the drawers finger jointed to the drawers' sides. The problem is, I don't have enough timber to make 10 full drawer sides (2 per drawer). Ideally I'd make the drawer carcasses out of plywood, however if I use plywood for the sides, you'll see plywood end grain where the face and sides are finger jointed together - not a good look!
So - I was thinking of 'cheating' : making the front 100mm of the drawer sides out of the native timber, and then the back 300mm out of plywood, which would be 14mm thick. I usually do the bottom of the drawer 'floating' in a groove, however perhaps in this instance securing it would be a good idea - to help create some rigidity between the sides, base and carcasse end.
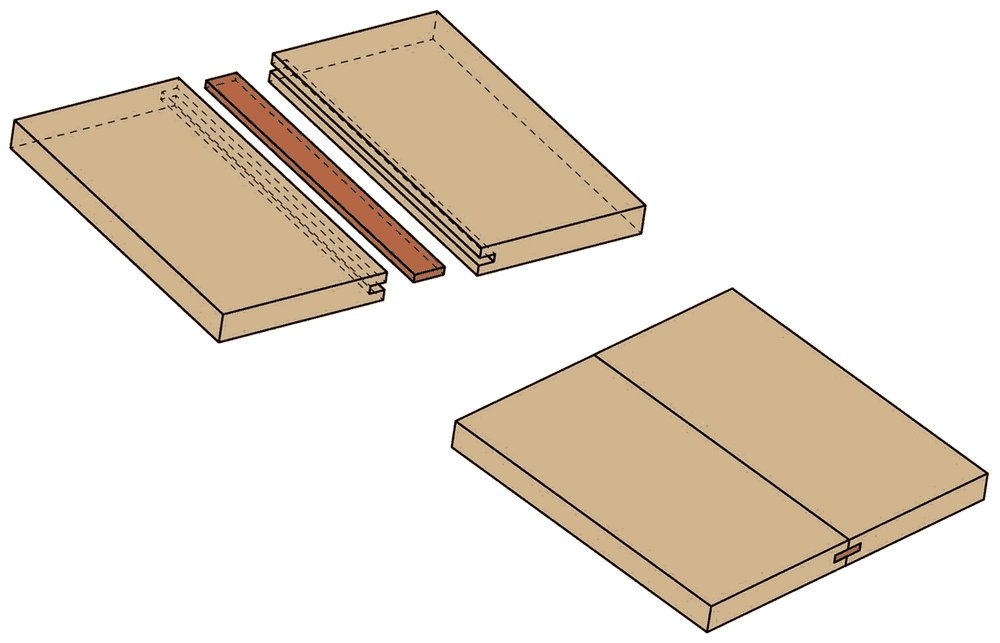
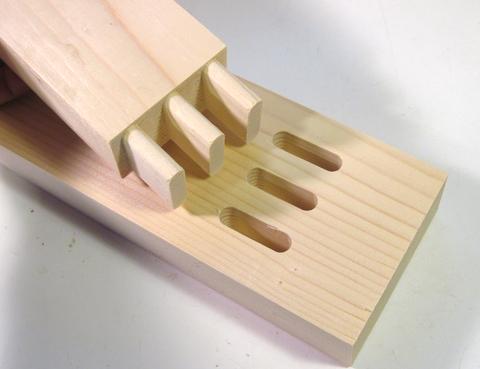
Would the ply to native timber joint be strong enough? I would join the two 'ends' using my domino jointer.
Any other solutions?
Matthew
I'm making a chest of drawers with 5 drawers out of recycled native (NZ) timber. To have it match existing furniture I've made (in the same room), I want to have the face of the drawers finger jointed to the drawers' sides. The problem is, I don't have enough timber to make 10 full drawer sides (2 per drawer). Ideally I'd make the drawer carcasses out of plywood, however if I use plywood for the sides, you'll see plywood end grain where the face and sides are finger jointed together - not a good look!
So - I was thinking of 'cheating' : making the front 100mm of the drawer sides out of the native timber, and then the back 300mm out of plywood, which would be 14mm thick. I usually do the bottom of the drawer 'floating' in a groove, however perhaps in this instance securing it would be a good idea - to help create some rigidity between the sides, base and carcasse end.
Would the ply to native timber joint be strong enough? I would join the two 'ends' using my domino jointer.
Any other solutions?
Matthew