I can't get my head around creating two identical parts, one male and one female part that will fit perfectly together with only one template and a bushing set.
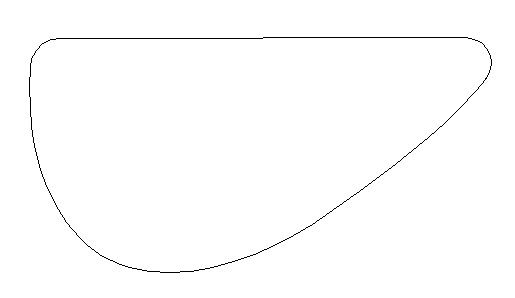
Can anyone give me a run through on how that's done, I'd like to know if I need to create a male or a female template for this and which bushings and size bits I should use. This is what I'm trying to make, it's about 6 inches long.
![Image]()
Can anyone give me a run through on how that's done, I'd like to know if I need to create a male or a female template for this and which bushings and size bits I should use. This is what I'm trying to make, it's about 6 inches long.
")