Router Forums banner

Making A Zero Clearance Throat Plate

11K views 41 replies 19 participants last post by  Gaia  
#1 ·
Hi all,
I was wondering if anyone could help me out with the following.
I've been looking around for methods to make a zero clearance throat plate.

I've decided on the Instructables one. You can see the method here:

Easy zero clearance throatplate for any table saw

I asked the author to help clarify a few points, I don't know if he still maintains his site, I haven't heard back from him.

These are the points I asked him to make clearer, any help much appreciated.
Thanks.

" Hi,
I'm emailing you about your Instructables Easy zero clearance throatplate for any table saw.
Would be appreciated if you could clarify a couple of points.

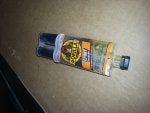
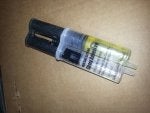
Ebay UK I can't buy Loctite Epoxy Gel. I can buy Loctite Super Glue-Power Flex Gel Flexable
adhesive see Ebay UK item number 151760378900. I assume this is much the same stuff and will be OK?

In the UK we don't sell masonite , we do have what we call hardboard. I Googled,
and seems masonite and hardboard are the same thing.

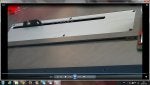
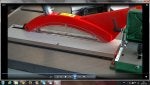
The filler strip, " Cutting the filler thicker lets you sand it perfectly with the plate. "
How do I go about sanding the filler strip perfectly level with the plate?

" You might want to use a glue that you can soften with heat, so you can remove and replace it after it gets old.
I used wood glue. "

I looked up Elmers Carpenters wood glue didn't give any information about being able to soften with heat.
I Googled carpenters wood glues that can be removed with the application of heat.
I found, " white glue is a must-have for interior craft projects. Made with polyvinyl acetate (PVA)
and can be softened with steam or warm water." So would I be OK to glue the filler in place with PVA?
Thanks. "
 
#2 ·
Yikes! Peter, I haven't seen the link and based on the questions, I'm not going to bother. No reflection on you, your question is very reasonable, but glue? Sanding the surface flush? Hardboard?
Making zero clearance blanks is for most saws as simple as tracing the existing metal one onto a piece of plywood the proper thickness...a little thin we can work with; too thick not so much.
Make a bunch of blanks at the same time and put them aside. Maybe 4-6?
You want the plate to be a sweet fit...not tight and not loose. Jigsaw/scrollsaw/bandsaw the shapes to size and then sand the edges to fit the opening.*
Not all saws are the same, you may have to be inventive here; my Dewalt contractor saw needs 1/2'' plywood, with small wood screws on the underside for adjusting the plate for flush and level with the saw tabletop.
Once you've crafted the perimeter for that sweet fit, crank your blade down below the saw top, install your new plate, and crank the energized blade slowly up through it while holding the plate down with a piece of clamped scrap...no metal parts anywhere near the throat plate!
Some saws have a small notch in the rear of the top casting into which you tuck a small screw mounted in the rear of the new throat plates.

*THIS IS A ROUTER FORUM and a lot of the members simply use the metal throat plate as a template for routing out the new blanks...sounds way simpler than sawing and sanding! I'm a geezer, and stuck in my ways. :)
I'll let the router gurus explain their process

Good luck!
 
#3 · (Edited)
What kind of epoxy do you have available for purchase? I would think any type of 5 minute epoxy would work. Read the label and make sure it will adhere metal to wood.

Around here, there is a whole display at the local big box stores to choose from. Gorilla Glue, Locktite and several other brands will all do the same thing.

My thinking about the sanding part.
You could take a flat piece of board or plywood and glue a strip of sandpaper to it the same width as your new zero clearance (or maybe a little wider). If needed, add a simple block to the plywood to make a crude handle.

Rub it back and forth until the filler piece is flush with the metal surface. I would definitely measure carefully before cutting the filelr piece so sanding would be a minimum because...wait for it...
...
...
...

I hate sanding! :grin::frown:

I may try this method with the throat plate that came with my new DeWalt portable saw. It has a thin plate as mentioned in the article.

Good luck.
Mike
 
#5 ·
Peter, that would work Ok I suppose.... Just seems like a lot of work to me.

I chose the method that Dan mentioned. I used double side tape to fasten a blank to my existing table saw insert and used a pattern bit to cut it to size on the router table. A screw in each corner on the bottom, and adjusted them as needed to level the plate with the table. Once it's cut and leveled, move your fence over it, the side that the blade doesn't come up on, turn the saw on and raise the blade up thru the zc insert. I DID have to groove the insert on the bottom to provide clearance for the blade.
 
  • Like
Reactions: Gaia
#8 ·
Peter; may I just add that you'll need to drill a finger hole in a convenient location to make it easy to lift your new zero clearance blanks up out of the saw opening.
I don't know what the OEM plate costs but if you start modifying it you'll be buying a new one to use as Ronald just suggested.
 
#17 ·
Umm,
I have an aluminium insert, just started thinking,sanding would quite likely scratch up the surface finish. The original aluminium plate is only 3 mm thick.
See photos for what I have.
If it was thicker I think I'd have more options, when I was looking into insert designs they all seem to use thicker material.
As my plate is only 3 mm thick, I wasn't sure, say 3 mm ply would be rigid enough. Gluing hardboard to the underneath of the plate appeared to address this problem.

I have a Metabo 10 inch jointer/planer as well as my Dewalt 733 thicknesser. I could get plywood, MDF down to 3 mm
then again I'm not sure material that thick would be rigid enough?
The Metabo is a clone design of the Electa Beckum which had very good independant reviews
 

Attachments

#18 ·
What does the plate sit on? Are there lugs or complete strips of protruding metal from the table top? If lugs, just remove wood from the new insert where they go until the plate sits just slightly lower than the table top and add grub screws to the insert to level it.

Likewise, if there is a strip either side protruding from the table top, for the insert to sit on, rout a channel each side of the new insert, again so it sits slightly lower than table top, then use grubs screws to raise it to table top level.
 
#24 ·
Plexiglass, never thought of that or saw mentioned. Did a very quick Google, seems nice and rigid as I think you are more familiar with it.
Any favored method of cutting and drilling, will I be OK to round the corners with my pillar drill sanding drum?
Cheers.
 
#25 ·
I also have a Craftsman saw and I like the idea of the first post and link, and Im going to do that. But also you may use all the examples uloaded here but you need to make a rabet along the bottom face of the inserts, to fit the size of the lip (tall and wide), I hope I explain myself. I saw that in some write up, if I find it, I upload it later. :wink:
 
#32 ·
Oh yes thanks, I saw that one, the helpful young lad has the Axminster Trade Series AW10BSB2 Saw Bench. I have the Axminster Trade Series AW12BSB2 Saw Bench. Really beautiful piece of machinery, step up from the Triton. I've decided making the zero throat plate out of plexiglass is the way to go see can get 3mm.
 
#31 ·
Just finished an insert in Baltic Birch a couple of minutes ago. Carefully measured the depth from top to the resting ledge on my Laguna saw. It was precisely 3/8ths, so I set the table saw blade so it left a 3/8ths gap between blade and fence. In essence, I cut a rabbit all round the bottom edge of the insert. Traced the existing insert and cut it out on the band saw, then sanded to fit. Worked OK for an insert for the dado set.

While doing this, I noticed that the riving knife on the factory insert does not go all the way to the back of the insert, and that being plastic, there was a slight twist that kept the insert from ever being parallel to the opening, which explains why no matter how I adjusted it, I could never stop the workpiece from catching at that edge. So in the future, my inserts for blades with the riving knife will have a solid back edge so the Riving knife passes through, but the insert stays flat.

I noticed while doing this that the back rounded edge has a couple of tabs to keep the back end locked in place under the table. With a solid back putting some clips in might help with the top alignment on inserts.

I may also take a suggestion from a previous post and make future inserts from plastic kitchen cutting boards.

I do think it will be easier to shape using the router and an edge trimming bit than fiddling with the band saw and sanding.
 
#33 ·
Not quite Got the Hang Of Replying To The Forum

Posting with or without quotes, or just a plain reply, if original poster gets rfeply, will have to read up on the forum on how to reply.
Some people who replied to my original post, sorry if not replied.
 
#37 ·
I never saw that site or those plans but came up with a similar solution on my own.
I used a 1/2 inch thick piece of poplar and made a rabbet down the sides so the center section was as high as the thickness of the saw insert.
I then drilled and counter sunk six holes (three per side) around the opening in the metal Craftsman insert.
I then used some #6 wood screws to secure the wooden insert to the metal plate.
After using the standard precautions to raise the spinning blade up through the wood, I removed the assembly, extended the opening back using wider drill bits to allow for the splitter bar to rise out of the saw with the blade.
It has been working great and I can always change the wood insert whenever needed.
 
#38 ·
Peter...nice idea having a piece of wood attached to the existing plate...but I wouldn't use epoxy...that makes the modification permanent.

If you're going to modify your existing plate, drill through the plate and taper the drill hole...the taper should be such that a small screw will sit flush with the top of the plate (or even lower). This would allow you to use the same plate over and over with new pieces of wood.

This assumes you not making new ones as has been suggested by many above...