Router Forums banner

Question for Canadians

12K views 47 replies 15 participants last post by  Stick486  
#1 ·
The significant other and I have been enjoying watching Holmes Inspections on Netflix. (I would really like for him to come to my house and give me a bunch of free stuff, but that's not my question....)

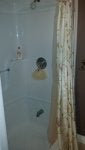
The question I have is regarding the plumbing code up North. On the shower installs we have seen, there's a tub spout in the shower stall. Is that code up north? Why would a tub spout be required inside a shower stall?

Inquiring minds want to know!
 
#2 · (Edited)
Dan I've never heard of that one ?
Ok I think I know what you seen . Someone put a niche in the shower and your interpreting it as an overflow hole . It's a foot well for woman to shave there legs , or strange guys. The hole provides the foot something to hold it up
 
#4 ·
It so you can get into the shower and adjust temp before turning on shower. Why because probably a glass enclosure you can not slide the door opens and turn the water on with a glass enclosure.
 
#5 ·
Found this on the 'net - from Canadian Living magazine, a question/answer interview with Mike Holmes:
Article Here

Q: What is the very low faucet I've seen in some of the walk-in showers you've built?

A: This is the funniest question I get! In Canada, when you have a shower with no tub, it's common to have a “toe-tester” faucet. It's so you can test the water temperature before you step into the shower and either scald yourself or freeze! I keep hearing from U.S. fans that they don't have them down there, but I'm not sure why they're not
 
#8 ·
Thank for the reply, guys! My eagle eye wife saw this one first, then on subsequent episodes, there it was again. I was thinking for bucket filling, but testing the water makes sense as well. They even had one on a stall that had an adjacent tub.

Geez, had I realized it was a status symbol, I would have put one in the shower stall I just finished! Then all my friends would have wondered with me why it was there ;)
 
#11 ·
We have 2 in our shower enclosure - hot and cold. Before taking a shower we run the hot tap into a bucket until it is hot, and use the water on the garden - (here in SA we need to save water), and since we operate on a conservancy tank system, it saves space in the tank as well. The cold tap is just to be able to fill a bucket if required.
 
#12 ·
Let's make sure we are all taking about the same thing.
Shower stall- where you stand up to bath and the unit only has a short area to contain the water. A tub spout near the bottom would be useless- it would flood the bathroom and provide nfunction otherwise.
Tub- We have a bathtub/shower combination in our main bathroom. It has a full size bathtub with the water faucet plus there is a shower head at the top of the panel. The shower is operated by a diverter valve on the tub spout.
As for a tub faucet/spout in a shower..........why?
BTW, both our shower stall and tub are one piece fiberglass. The bath area off the master bedroom is considered a 3/4 bath and the other is considered a full bath. Half bath has to bathing facilities.
 
#13 ·
@Knothead47

John:
In our spare bathroom we have a regular tub with a shower head - yup a bathtub/shower combination.
In our main bathroom we have a whirlpool tub - a regular tub with jets that sits alone - no shower head.
Beside the tub we have a standalone shower stall, large enough for two people to stand in (we don't do that anymore :) )
It does not flood the bathroom as the shower stall is slightly raised to contain water. That shower stall has the toe tester in it.

Here's a picture of the shower stall
 

Attachments

#19 ·
I can definitely see the functionality.

I just completed a shower remodel, the old shower stall had rotted to the point of taking out the flooring below it. Back when the house was built, I guess the builders considered concrete a moisture barrier. Not.

I started this thread after completing the plumbing and tile. That figures. I could have put one in my stall too!

The other bathroom has a tub, no shower... that is my next remodel project. Gee, this retirement is fun. I think I am busier now than I was when I was working!
 
#20 ·
I can definitely see the functionality.

I just completed a shower remodel, the old shower stall had rotted to the point of taking out the flooring below it. Back when the house was built, I guess the builders considered concrete a moisture barrier. Not.

I started this thread after completing the plumbing and tile. That figures. I could have put one in my stall too!

The other bathroom has a tub, no shower... that is my next remodel project. Gee, this retirement is fun. I think I am busier now than I was when I was working!
Dan - with all the stuff I do now that I'm retired, I don't know how I ever found the time to go to work
 
#21 ·
Dan 3103,
If you have/had mortar under a fiberglass shower base it was there to fill in and solidify the cavity under the base. Many of the fiberglass tubs, showers and tub/showers from the 70s and 80s were made so thin that the bases were cracking and or splitting. Put too much weight at one spot, slip and fall, crack and crack some more never an issue with cast iron.
 
#22 ·
The old pan was a concrete base with tile on top, but the waterproofing was minimal at best. The design allowed water to seep into the concrete through the grout lines, filling the paper/tar "tub" that was used back in those days. The water below the drain could not drain, which meant that there was always water saturating the concrete in the pan. The walls of the shower were sheet rock with chicken wire/thinset laid over the drywall, then tile over that. Through the years, water weeped through the grout lines and saturated the thinset walls, wicking into the drywall, turning it in to a sloppy mush. The water would eventually make it's way to the pan, but there were holes in the paper/tar membrane, allowing water to leak into the 2x6 tongue and groove floor decking and the doubled 2x8 that held things up. All that wood rotted as well as 4 of the wall studs. I took 1600 lbs of material out of the shower/pantry area to the dump. Most of the concrete that was removed was dripping wet even days later.

I replaced the tub with a proper concrete/membrane pan done in two steps and re-tiled the walls and ceiling over Durock backer board and Red Guard waterproofing. It will never leak again. And if it does, it will be the kid's problem, not mine :D
 
#27 ·
The old pan was a concrete base with tile on top, but the waterproofing was minimal at best. The design allowed water to seep into the concrete through the grout lines, filling the paper/tar "tub" that was used back in those days. The water below the drain could not drain, which meant that there was always water saturating the concrete in the pan. The walls of the shower were sheet rock with chicken wire/thinset laid over the drywall, then tile over that. Through the years, water weeped through the grout lines and saturated the thinset walls, wicking into the drywall, turning it in to a sloppy mush. The water would eventually make it's way to the pan, but there were holes in the paper/tar membrane, allowing water to leak into the 2x6 tongue and groove floor decking and the doubled 2x8 that held things up. All that wood rotted as well as 4 of the wall studs. I took 1600 lbs of material out of the shower/pantry area to the dump. Most of the concrete that was removed was dripping wet even days later.

:D
This is one of the reasons that I hate stucco over a wood wall. It will hold moisture and rot out the sheeting and the studs if it is not done correctly. Most contractors were using Tyvek house wrap as an underlayment and not properly flashing windows and doors. The moisture would build up and rot the wood and water would infiltrate the door and window framing.

EDPM is a great flashing and underlayment material. If applied properly it will never allow the water to come near the structure.
 
#28 ·
Unless you're going with a tub or shower surround the best product I've found and used for tiling in 20 something yrs is Durock. Not only does it solve regular, green and blue board rot problems it's a perfect backer for thin set or adhesive.
 
#30 · (Edited)
I didn't even consider EPDM, I never saw it mentioned on the zillion web sites I looked at before getting started. I ended up using Oatey shower pan liner between the concrete layers.

I thought about using Shluter's Kerdi system to do the shower, but had already done one with Hardi board and Red Guard, and stayed with what is familiar. From what I learned on the web, Kerdi is a great product, but takes a bit of learning to do it right. It was kind of spendy, too.

When I did the pan, I did a bunch of watching and decided to do a concrete one. It was pretty time consuming, but wasn't all that difficult. There's a few really good videos on the web to watch, but two kind of stood out for me;


and


The second one goes from stud walls through the finish in a bunch of videos. Both guys seem to know their stuff. Another good resource for me was www.floorelf.com. The guy that does that site has a really wry sense of humor (which I kind of like) and really knows his stuff.

Watching those videos is kind of like surfing this forum if you have router questions. There are a bunch of guys here that give awesome advice. Sometimes there are differing opinions, but often there are multiple ways to do the job.
 
#32 ·
Rick,

Use only enough non galvy roofers to hold the board in place then secure it with SST bugle screws flush just like shtrk.

There're probably tons of brands on the market now and I don't know their manufacture processes, I've only used Durock. If you've never used it before know it has a plastic mesh sandwiched in the center. When cutting use a 1X 3 or 4 as a straightedge, and buy a carpet knife or a quick change utility knife and a pack of utility blades to make the cuts, you'll burn through the blades.
 
#33 ·
Or Wonderboard, or Hardiboard...basically all cement panels.
Custom Building Products Wonder Board Lite 5 ft. x 3 ft. x 7/16 in. Backer Board-GCB60L - The Home Depot
James Hardie HardieBacker 3 ft. x 5 ft. x 1/4 in. Cement Backerboard-220022 - The Home Depot

Personally, I prefer the Wonderboard; it's a hair under 1/2" thick, so it lines up nicely with the adjacent drywall. If you're carrying the tile on, it's an easy transition.
DO NOT USE MASTIC* for tile setting in a damp environment! You'll regret it. Fibreglass tape and thinset in the joints and over the screws followed by a couple of coats of acrylic bonding agent on the backer board is really worth the extra few minutes it takes, before applying the thinset. I usually apply it the day before and let it dry


* same for floors. It's fine for walls and wall bases, and backsplashes