
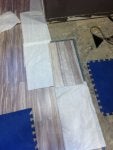
I'm going to be helping my son lay some vinyl plank style tile in a basement bathroom. This is the stuff with a lap style joint system where the top of the tongue has adhesive on it and the underside of the flap on the backside also has adhesive. Seems to me I've read that these can be tricky to get lined up before the adhesive grabs so I'm curious if any members have experience with them and any tricks or suggestions to offer.

Cherryville Chuck

")

-
?
-
?
-
?
-
?
-
?
-
?
-
?
-
?
-
?
-
?
-
?
-
?
-
?
-
?
-
?
-
?
-
?
-
?
-
?
-
?


