Router Forums banner

Building cordless drill / air nailer shelf

18K views 119 replies 21 participants last post by  vchiarelli  
#1 · (Edited)
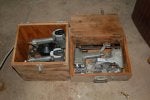
Building cordless drill , air nailer storage cabinet .

Guys I really liked Mikes shelf that he built to hold his drills and air nailers . I have gotten my own version started but I am changing it up a bit as I am putting two shallow drawers underneath to hold all the differant air nails and screw driver bits .

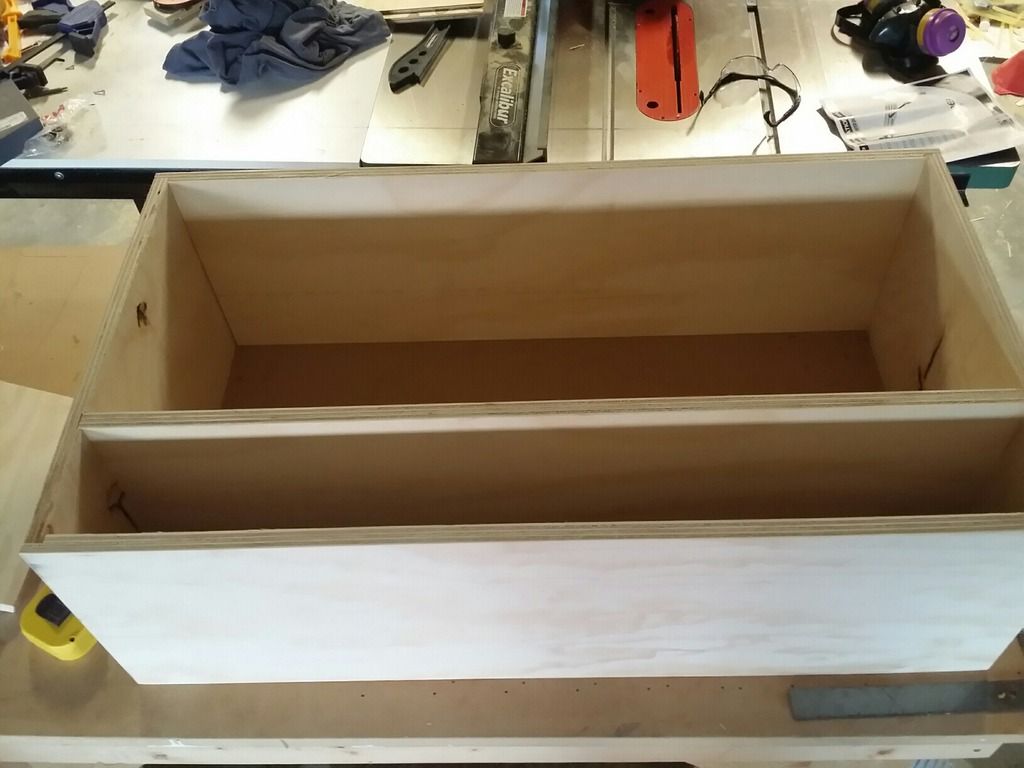
So I did rabbet joints on the lower and top pieces , and dadoed a slot for the middle piece .In this pic the bottom is to the left and the top to the right , just to avoid confusion .
It hasn't been glued yet as I have more slots to dado in .


My mistake is I really should have done the rabbets on the sides as now I'm going to have one hell of a time dadoing 1/4" slots on the upper and lower parts to put dividers in and get the measurements even because the top and middle sections are differant lengths when disassembled.
Originally I was going to rabbet the sides but I couldn't afford to loose any height as I cut them to short .
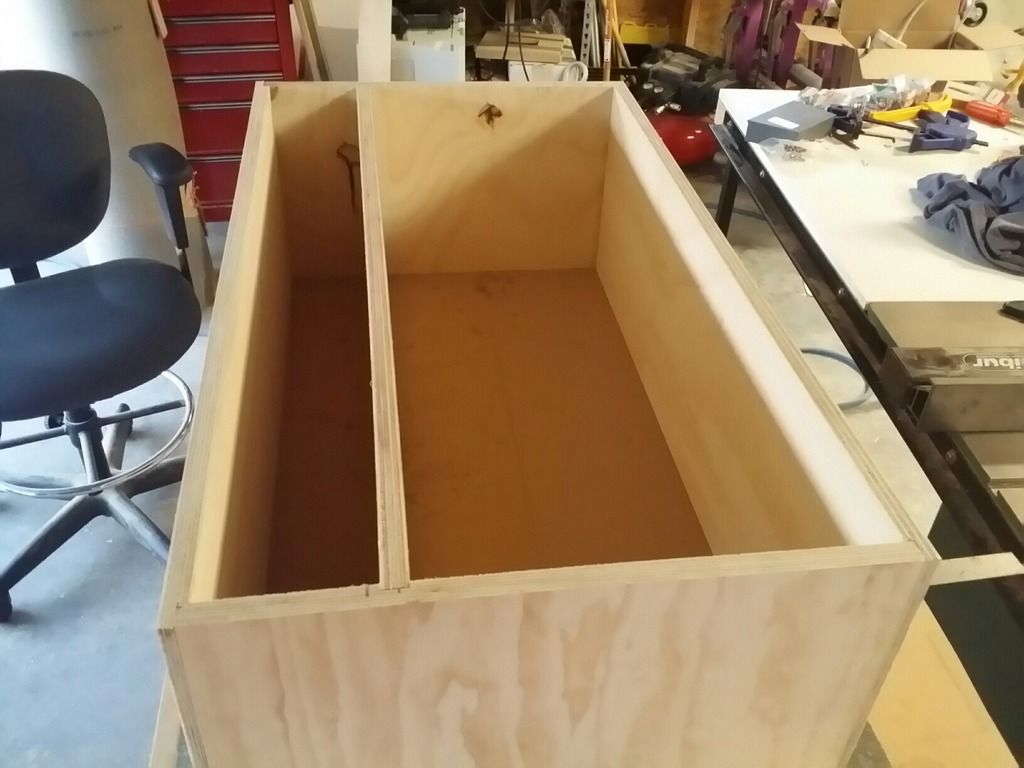
This is how it sits . The narrow part is the bottom for the drawers


I still have to dado in the slot to add a divider between the drawers , which is still going to be a careful cut because of them being differant lengths .

I'm thinking that because it's going to be a pain to dado in all the upper and lower slots for 1/4 dividers that maybe I should go with 1/2" dividers instead and install them with pocket screws . This way all I need is a spacer to hold each vertical divider and just screw them in . That's assuming there's enough room for the drill to install the pocket screws which I believe there will be
 
#2 · (Edited)
Actually I just had another thought . Instead of using a dado blade on the table saw to make the slots for the dividers , assemble the cabinet and then use my router to make the slots . All I would need is a spacer for the router to sit against and guide it

Sure as heck it will get away on me though :(
 
#3 ·
Should be an easy workaround Rick. Make a spacer the width of the difference between the shelf width and the cabinet bottom width at one side. Make a dado on the shelf bottom referenced to the fence, then use the spacer between the shelf and the fence to account for the offset. Use your miter gauge and make the corresponding dado in the shelf bottom. Move fence and repeat.
 
#4 · (Edited)
Thanks Jeff as that's a good idea ;)

I can hardly wait to complete this . I'm really looking forward to having a place where I can always find air nails and screw driver bits . I'm going to make some half lap dividers inside the drawers and fill it with all the common lengths of air nails . I bought a husky plastic tool box but it didn't like the weight of the air nails and kinda bent
 
#5 ·
I'm right behind you Rick, I can't wait to get this project started in my shop and I really like what you've done so far. Every little mistake you make now, I won't have to repeat when I start mine. Now I've just got to re-surface 300sq' of deck, build a carport over the 12x24 pad that was poured behind my garage today, and it's on to laying down french cleats. Bet I'm done before your insulation is in:grin:
 
#7 ·
Rick, if you lay your boards on a bench you can line them up and use a straight edge to make your dadoes with your router. Imagine getting a tip like that on a website like this; what is the world coming to?
 
#8 ·
Mike I have Festool track to but I bought the wrong parts and I can't get the router to attach to it yet . I know I don't need track but I want to try it onetime .
I'm going to use the TS for now I think
 
#10 ·
Rick,

If there's enough distance between the top and shelf for your router, adding the grooves for the dividers is easy as long as the back isn't permanently attached yet (I'm assuming this from your post). Make an accurate T-Square out of a couple of scraps, set the base against the edge of a scrap board and rout through the end - this will give you an exact location for the groove and, as you're using (I think) 1/4" hardboard, a standard 1/4" bit will work. Lay out the location of the dividers on the top and shelf, set the T-Square in place with the edge of the slot lined up with the mark, clamp the end so it doesn't move and rout your slot. With no back in the cabinet, you can flip the T-Square end for end and rout from either side as you get close to the sides. As far as the dividers for the drawers in the lower area, make a block of the appropriate width, slide the divider up against it to fix the location and nail it in place - it's just a shop cabinet, a little glue and some finish nails is all you need. All my original shop wall cabinets are built with the tops,, bottoms and shelves glued into dadoes/rabbets and held with narrow crown staples and they've held up for 20+ years - wish I'd put adjustable shelves in them now but that's another story. Mostly use pocket holes now but still use dadoes and staples for a cabinet that's a little unwieldy.

Tom
 
#11 ·
These 2 simple boxes hold my remaining roofers and sidewall guns. As time passed and fewer roofs and siding jobs came in I sold one of each. They went into the boxes and my shop around 06 when I averaged a roof or sidewall job a yr.

See the little white dot on the roofer's inlet? I wish I could remember where I got them, (maybe the repair shop); each gun had a crap cap. Outside of doing many of my own repairs I believe they were the main reason I had such low and few repair bills. Most of the caps had rings that prevented them from getting lost until they broke and got lost. If the gun wasn't hosed the cap was on, before the gun got hosed the hose was popped to release any crap in the female connector. These guns were bought between 1985 and 87, I used both recently reroofing my porch and sidewall repair above the new roof, 30 yrs ain't bad.
 

Attachments

#15 ·

Attachments

#16 ·
That's a pretty cool idea Mike . I may build one in the future when I have some extra time .

Guys I've got a concern . I read where a guy installed drawer guides and I never thought of this but if you put the screws in the same hole on each drawer the screws will hit each other .
I have to look at mine , but you would assume they have two screw holes side by side on each rail in order for this not to happen . Otherwise you'd have to stagger them
 
#18 ·
Put the adjacent slides at different heights. Put a 1/4" shim on the floor of the cabinet and then a strip to set the slides at a specific height. Bolt the slides in to the sides, slide the drawer part and then the drawer, sitting on the 1/4" shim. Pull the drawer and it's slide partway out so you can get a couple of screws into the drawer. Then pull it all the way out and put the rest of the screws in - just use a different width strip for the second drawer. The photos show me installing the slides in the drill press cabinet - a different shim was used for the top two drawers so that the drawer fronts would all be the same height.

Tom
 

Attachments

#20 · (Edited)
Well I screwed up on mitering slots for the spacers on the first attempt , so I abandoned that cabinet altogether and built another .
But this time I did a rabbet joint on the sides as it helped with measuring up the middle for that spacer where the drawers go .
This is the rear view . I mitered out the perimeter of the upper section for the 1/2 ply back to drop in , but I was going to leave the bottom open as there's drawers in there and I don't why they would need to be closed .

I must have spent over a half hour with my dado blade and for some reason I had one hell of a time getting it set for the 1/4 ply I have on the first cabinet , but It was either to tight and after I add a blade and use its full adjustment it ended up to loose . I'm going to use 1/2 ply instead and just use pocket holes .
This isn't glued and screwed yet , just laying together . How I hate doing things twice :(

 
  • Like
Reactions: old55
#28 ·
Another option is to leave the opening bare and install Akro bins of the appropriate size in there side by side. Put one or two lengths of nails in each bin, put a label on the front of the bin and you can pull out the correct bin when you're ready to use the nails - no drawers, no drawer slides, no worries as you'll only have the weight of the nails in any individual bin to worry about at the time. And it may help to keep the various nails/brads separated and easier to find rather than having to go through a whole drawer full of cardboard boxes every time. I'm planning to do something similar in my shop, except I'll be making an open box to attach to the bottom of my existing cabinets.

Tom
 
#26 ·
@schnewj...
something I picked up from making my plane rack...

make your dividers from S4S...
make the drawer bottom from ÂĽ pegboard...
insert a plastic ribbed collar ÂĽ anchor as required... (see picture)
clip off part of the lower end if they work out to be too long...
install #6 wood screws into the edges of the S4S one 1'' increment centers to act as studs......
plug the studded S4S into the anchors to be your dividers...

Notes..
1/8 PB can be used but the holes tear up easily and won't accept weight of any kind w/o sagging......
predrill the S4S to accept the screws..
ball end the heads of the screws and use pliers to insert the studs into the S4S..
the screws need to be 1ÂĽ - 1Âľ'' long depending on how much you leave proud...
the ball end and smooth shank facilitate insertion into the anchors and any exposed threads add grip/holding...
leave at least ½ in protruding to a max of ¾ in...
better quality S4S begets thinner dividers..
add purloins in torsion box format to carry more weight if need be...

Easy center finding...
say the stock is ÂĽ" thick...
put a ÂĽ" forstner bit in the DP..
slide the fence up to the bit and lock it down...
presto... center of stock all done...
swap out bits to what you need to drill..
set the stock to the fence...
drill...
different thicknesses of material ???... use a forstner bit to match the diameter....


.
Image
 
  • Like
Reactions: RainMan 2.0
#30 · (Edited)
Ok thank god I'm not being paid by the job because I wouldn't have enough money to pay for my lunch.
Anyways MT had a great idea and something I never would have implemented had he not showed his creation .
I liked Mikes idea of removing some material away from the middle of the divider , so here I am measuring a guess of what to try


So I jigsawed most of the material I needed to remove first then clamped the divider to a straight piece of mdf to act as a guide for a flush bit . I re clamped it to do the 45's , so I had to free hand it a bit because I was being lazy .


I had some tear out on the right so I thought maybe make more of a radiuse on the corners to make it look better


So I used the finished divider as a template to make 6 more of itself


So I thought instead of mitering in 1/4" slots to slide the dividers in I would try something differant . I air nailed a piece of 1/2" mdf top and bottom , then held the divider in tightly against it and added more mdf spacers . With this idea all you need to do is get a chisel and remove the mdf spacer and cut another to a differant size if you change the arrangement


Which I had to do as I changed my mind a few times getting it right


Guys I am very happy with the outcome so far . The dividers stay in extremely well just press fit.
I did most of the openings 4" wide but I did two of them 4.5" wide for bigger tools . On the right is my electric stapler which I can rarely find . This is going to be worth all the effort. Just gotta find my other drills now lol


So now it's off to the garage to make an attempt at the drawers
 
#39 · (Edited)
Well guys has anyone gone postal installing drawers ? I can say I've been at it for hours tweaking and trying to figure out where I went wrong . It's ok but some odd reason the left side of the drawer wants to rest uneven when you shut it . Checked and the first thing that went and the drawer wasn't square , so I took it out and beat on it a bit till it was very close , but after removing the slides and relocating them nothing seems to work ?
I'm debating to locate them back a little further because it's not an issue till they get to the area where they have a bit of resistance .

Tried a lock joint . It's not difficult and it was my first attempt and on the left you can see where I over shot it a few thousands . Not sure if this is more trouble than it's worth as in debating to back to rabbet joints


I mitered the slot for the 1/4" bottom and although I thought there was a bit of play there wasn't a lot which made it tight putting together but I got it .
Sorry the lighting is bad as its late and the pics turned out poor but you get the idea


I'm debating to move this back a 1/2" and see if it closes better so it doesn't meet resistance for that anti slam system


This is the slider on the drawer . I think the distance to the front is correct


Here it is closed . I have to build a front for it yet but I'm debating to build another one and see if it works better . I did make the opening a 1/16" bigger than neccesary , so maybe I should put a shim behind the track on the inside wall and see if it shuts better
 
#46 ·
Rick,

All you need is for the drawer to ride between the sides of the opening. You can add a piece on the sides of the opening or on the drawer itself. They would keep the drawer centered. Ideally, I would just make another drawer if you have the material, or make it later.

Remember, wood moves. So, leave room for expansion on the sides and top, or the drawer will, at some point swell and stick. I shoot for 1/16-1/8 inch gap on either side and at least 1/8" between the top of the drawer and the top of the opening. Let the drawer ride on the bottom of the opening.

Bill
 
  • Like
Reactions: RainMan 2.0
#47 ·
I think I'd be using pocket screws and butt joints with glue if I really wanted it strong. It's a workshop drawer and doesn't need to look pretty. Once the cabinet is on the wall you'll not see in the drawers anyway unless you're ten feet tall.
 
#54 ·
I didnt think pocket screws were that strong . I'm going to skip the lock joint on the next try and do a rabbet joint with drywall screw .

I'm thinking lock joints on my bigger work station drawers though
 
#50 ·
Well this morning it's about as square as square can be . I really think I should try another guide as it doesn't make sense .
The guides can not be mounted any further ahead as the drawer just fully closed on the left now . I should just put a front on and see how it reacts .

The opening is 17" and I made the drawer 15 -15/16 wide in case it was to wide