Router Forums banner

circle cutting jig

17K views 24 replies 12 participants last post by  FastForward  
#1 ·
I'm looking to purchase a circle cutting jig that is capable of cutting small circles approx. 2-3" to approx. 2-3'. I know they're make able but would rather buy a heavy duty one.
 
#2 · (Edited)
#3 · (Edited)
Look through these they are heavy duty and I have three different models, I am happy with all of them:

Oval jigs

I have the 3210, the 3220 and the 3250. They are each a differnt type of jig construction. The 3220 is similar to the Rockler in that the base is one piece. The 3210 make really small ovals using a disc sander and moving the piece not the tool.

The largest ones has to use tracks because it goes so big. The benefit of the tracks that the differential can be adjusted to a big spread, larger than the single base units can give you. Try to make an 18" x 36" oval with the Rockler, you can't out of the box, with the tracks you can.

Oops sorry those are ovals! But of course they still work as circle jigs.

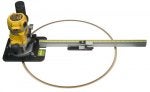
Here is the best circle jig I have ever used here:

Circle jig

All the circle jigs here:

http://www.woodhaven.com/Category.asp?Id=32

I have the micro adjuster on it and it really works. I have had it for 4 years and made probably 500 circles and it is still like new,. I have tried every other circle jig from other manufacturers and they are either limited by the 1/8" or 1/16" jumps or fall apart or are just a hassle to use. Mine is set up and always ready to use.

The Rockler jig I have is fine for circles too, but since I have all the Woodhaven stuff I prefer it. Every circle jig that comes out I try because I make circles 90% of the time for my projects and I am always looking to improve productivity..
 

Attachments

#6 ·
Hi,

At current time I have the OP jig. I used to have one that Milescrafter had made. A sears cheapie.
 
#7 ·
I had a question on bits for this.

I have jig I can use as a tramel for a specific cut and size for speaker building. That's why I got the router.

Straight bits are mentioned for the production jigs and 1/4 bit is the standard calibration for offset.

I've used hand set up[ with straight bits but I'm looking for the best and roundest circle system or maybe I shough say "sharpest."

A problem I ran into with a combination rotozip tool was starting out the cut ok but winding up with the bit wandering out of the pattern.

The bit that seems the best is the spiral upcut bit. And the center pin using a metal insert that fits tight like the Jasper would hopefully eliminate bit wander.

What kind of homebrew solutions would work best for this?

(I tried the search on here. Unfortunately that's the needle in the haystack.)
 
#8 ·
I like to use spiral bits. For me, they just work better and leave a smoother cut than any other bit I've tried.
 
#9 ·
Hamlin, Nice avatar.

All bits throw dust but how do the spiral upcut bits work with an attached vacuum?
Is there any difference.

Also what system is used to pin the center? On thse projects I am using particle board shelving to make speaker baffles. They are fast and cheap but hopefully not out of control.

The particle board cannot take a lot of wear.

What I've done in the past is use a t-nut as close to the size of the pin that is on the old roto tool.

Starting from scratch I wish to improve this and secure the pin to the socket some way
to avoid wobble.


This might mean screwing a pin directly into the trammel base and through the
baffle material. T-nuts were a good solution and repeatable. But that system does not
meet flush with the surface without counterboring and other tricks.

BTW I apologize if anyone thinks I hijacked the thread. Not intentional.
 
#10 ·
Hi,

All bits throw dust but how do the spiral upcut bits work with an attached vacuum?
Is there any difference.
There isn't any difference in the bits for dust. If you're using some type of DC, rather a true DC or shop vac, these will collect the dust.

Since I'm using the OP jig, I'm limited to the use of a... simple nail. There's no wobble, no huge hole to fill later. Plus the jig sits flat on the material you're working on. I do miss my old jig but, it had a lot of plastic in it and that was/is it's downfall.

Particle board and waffer board are both junk IMHO. Some people believe in them. :) I won't down them for that. Each his/her own. :)

BTW I apologize if anyone thinks I hijacked the thread. Not intentional.
Your question(s) are related. There are a few different ways to cutting circles. :)

You can find the jig I used to use here: http://www.sears.com/shc/s/p_10153_...000P?vName=Tools&cName=Power+Tool+Accessories&sName=Router+Tables+&+Attachments
Thought about getting another one but, still lots of plastic.:(
 
#11 ·
Well my working conditions are a long story.

The particle board is precut to 4 ft x 11in or so. It's easy to haul. Plus I will be
laminating this PB to some masonite to help get a good edge for mounting the speaker.

I don't know how much tear out I'll wind up with through the masonite/ hardboard layer. The masonite should give better screw bite as well.

Regards the Craftsman jig: $30 seems like a lot to wind up with using a nail.

The plexiglass jig I made from a piece I got free at the glass and window store
will be subject to wear but I'm hoping it will get through just these couple of jobs.

I have admired the Jasper jigs for a long time and those would be good for production but I'm shy of getting that for only the occasional cut.
 
#13 ·
The best one I've seen which can be made with the router uses a piece of good baltic birch or apple plywood. There is a slide rule type adjustment
made with some hardwood, a nail for a trammel and not much more.

The picture of jig is shown on the front of Bill Hylton's book called
"Router Magic." I reduced price copy can be gotten from this link:


As to online plans aside from a flat piece of material like I described above,
I haven't seen any.

Half.com / Books / Router Magic: Jigs, Fixtures, and Tricks to Unleash Your Router's Full Potential

The circle jig is the tear drop shaped base shown center left.

Small quantities of things like apple plywood can be gotten for a price at
places like Woodcrafters but I haven't been able to find any local merchants that have small pieces here.


A key hole bit is needed to make the track which is t-shaped

A thumb screw is used to secure the adjustment. The t-track slider allows circles to be cut down to 2 1/2 inches very close to the bit.
 
#14 ·
#24 ·
HI Guys

Here's one you can make in 5 mins.or less and some scrap wood ..plus you don't need to screw it to the router base..:)

[url removed 'cuz I haven't posted 10 times...]

========
Thanks a million for posting this! I built one of these out of a scrap of 3/4" MDF I had, and bought a $12.99 set of pattern guides at Harbor Freight. Works great for cutting circles with radii smaller than the router base!
 
#16 ·
The guide system looks like a good one. But I'm still not using guides myself. How is the guide installed and the two pieces connected on the jig without threads? I can't picture the two elements-- router and jig --working together.

I have a number of pieces of clear plexiglass which I think would be ideal for visibility in setup and usage.

Is there a set of guide assembly pics here?
 
#19 ·
I'm still studying thes because my projects are just for audio speakers and I don't build that often.

What confused me about the guide system for the circle jig was it appears that the
router portion of the guide is attached to the jig. This is apparently in error. After re-reading, there's just a hole into which the router with guide is mounted.

With that in mind, what is used for a precision tool to make the cutout hole? My first pick would be a hole cutter mounted in a drill press. I've made many speaker builds with
hole cutters by hand with a hand drill but that method doesn't guarantee a perpendicular cutout.
 
#20 ·
hello loninappleton,

id use a router with a 1/2 inch straight cutting bit.
 
#21 ·
Circle cutting

I have found that bulding exactly what you want is easier and more satisfying than spending the time (and money) searching for something that will do. I built my own circle cutting jig that can cut holes from 3" to 3' and can also be used for accurate dados. By simply cutting the first hole to match the depth and circumference of the speaker mounting hub, then reduce the cutting radius to the inner hub dimension and rout the remaining depth on the opposite side of the baffle, you will have perfect flush mounted speakers.
 

Attachments

#22 ·
I have found that bulding exactly what you want is easier and more satisfying than spending the time (and money) searching for something that will do. I built my own circle cutting jig that can cut holes from 3" to 3' and can also be used for accurate dados. By simply cutting the first hole to match the depth and circumference of the speaker mounting hub, then reduce the cutting radius to the inner hub dimension and rout the remaining depth on the opposite side of the baffle, you will have perfect flush mounted speakers.
jcuria,

That is a beauty. For one made similar of wood (for those who don't have a metal shop) Bill Hylton's book called Router magic has a similar item with adjustable arm. For me the problem here is getting a small cutoff of Baltic or Finnish birch to make it.

Here is what Bill Hyltons looks like from the book jacket:

Half.com / Books / Router Magic: Jigs, Fixtures, and Tricks to Unleash Your Router's Full Potential

I bought the book there.

For speakers the real problem starts with irregular square flanges. It's not insurmountable with a table, pattern cutting bit and guide bearings.

As a matter of fact Woodcraft has all those bits on deal now.

cheers
 
#25 ·
I strongly recommend this one, it can cut circles as small as 3/4" in diameter or even less if you account for that when you build it. As far as how big the circles that you can cut, it all depends on how long of guide rods you use.

h t t p : // www . youtube . com/watch?v=9oRqUK-CMIo&feature=related]YouTube - Making a Precision Router base
Just made one out of plexiglass and you can make one in a couple of hours if you have the tools.

The one I built takes a dremel, but I could have easily drill holes for my router in it.

P.S. Sorry for the spaces in the address, it doesn't allow me to post links unless I have more than 10 posts and this is my first.